Installing Mobile Nebula
Mobile Nebula is the iOS and Android app for joining a Managed Nebula network from a phone or tablet. It’s the mobile variant of DNClient: once a device is enrolled, it picks up its certificate, firewall rules, and configuration from the admin panel like any other host. This guide covers installing the app and enrolling a device.
Install the app
Section titled “Install the app”Install Mobile Nebula from the app store for your device:
- Mobile Nebula on the App Store for iPhone and iPad
- Mobile Nebula on Google Play for Android
The app updates through the store like any other app. Its release notes are in each store listing, separate from the DNClient changelog.
Create a host
Section titled “Create a host”Each device you enroll is a host in your network, created ahead of time by a Managed Nebula administrator. In the admin panel, go to Hosts and click Add host. Give the host a name, like phone-ana, and assign it a role, which decides what traffic other hosts accept from it.
After you save the host, the admin panel shows its setup screen. Choose Mobile as the operating system. You can also copy the plain enrollment code from the Advanced option on that screen.
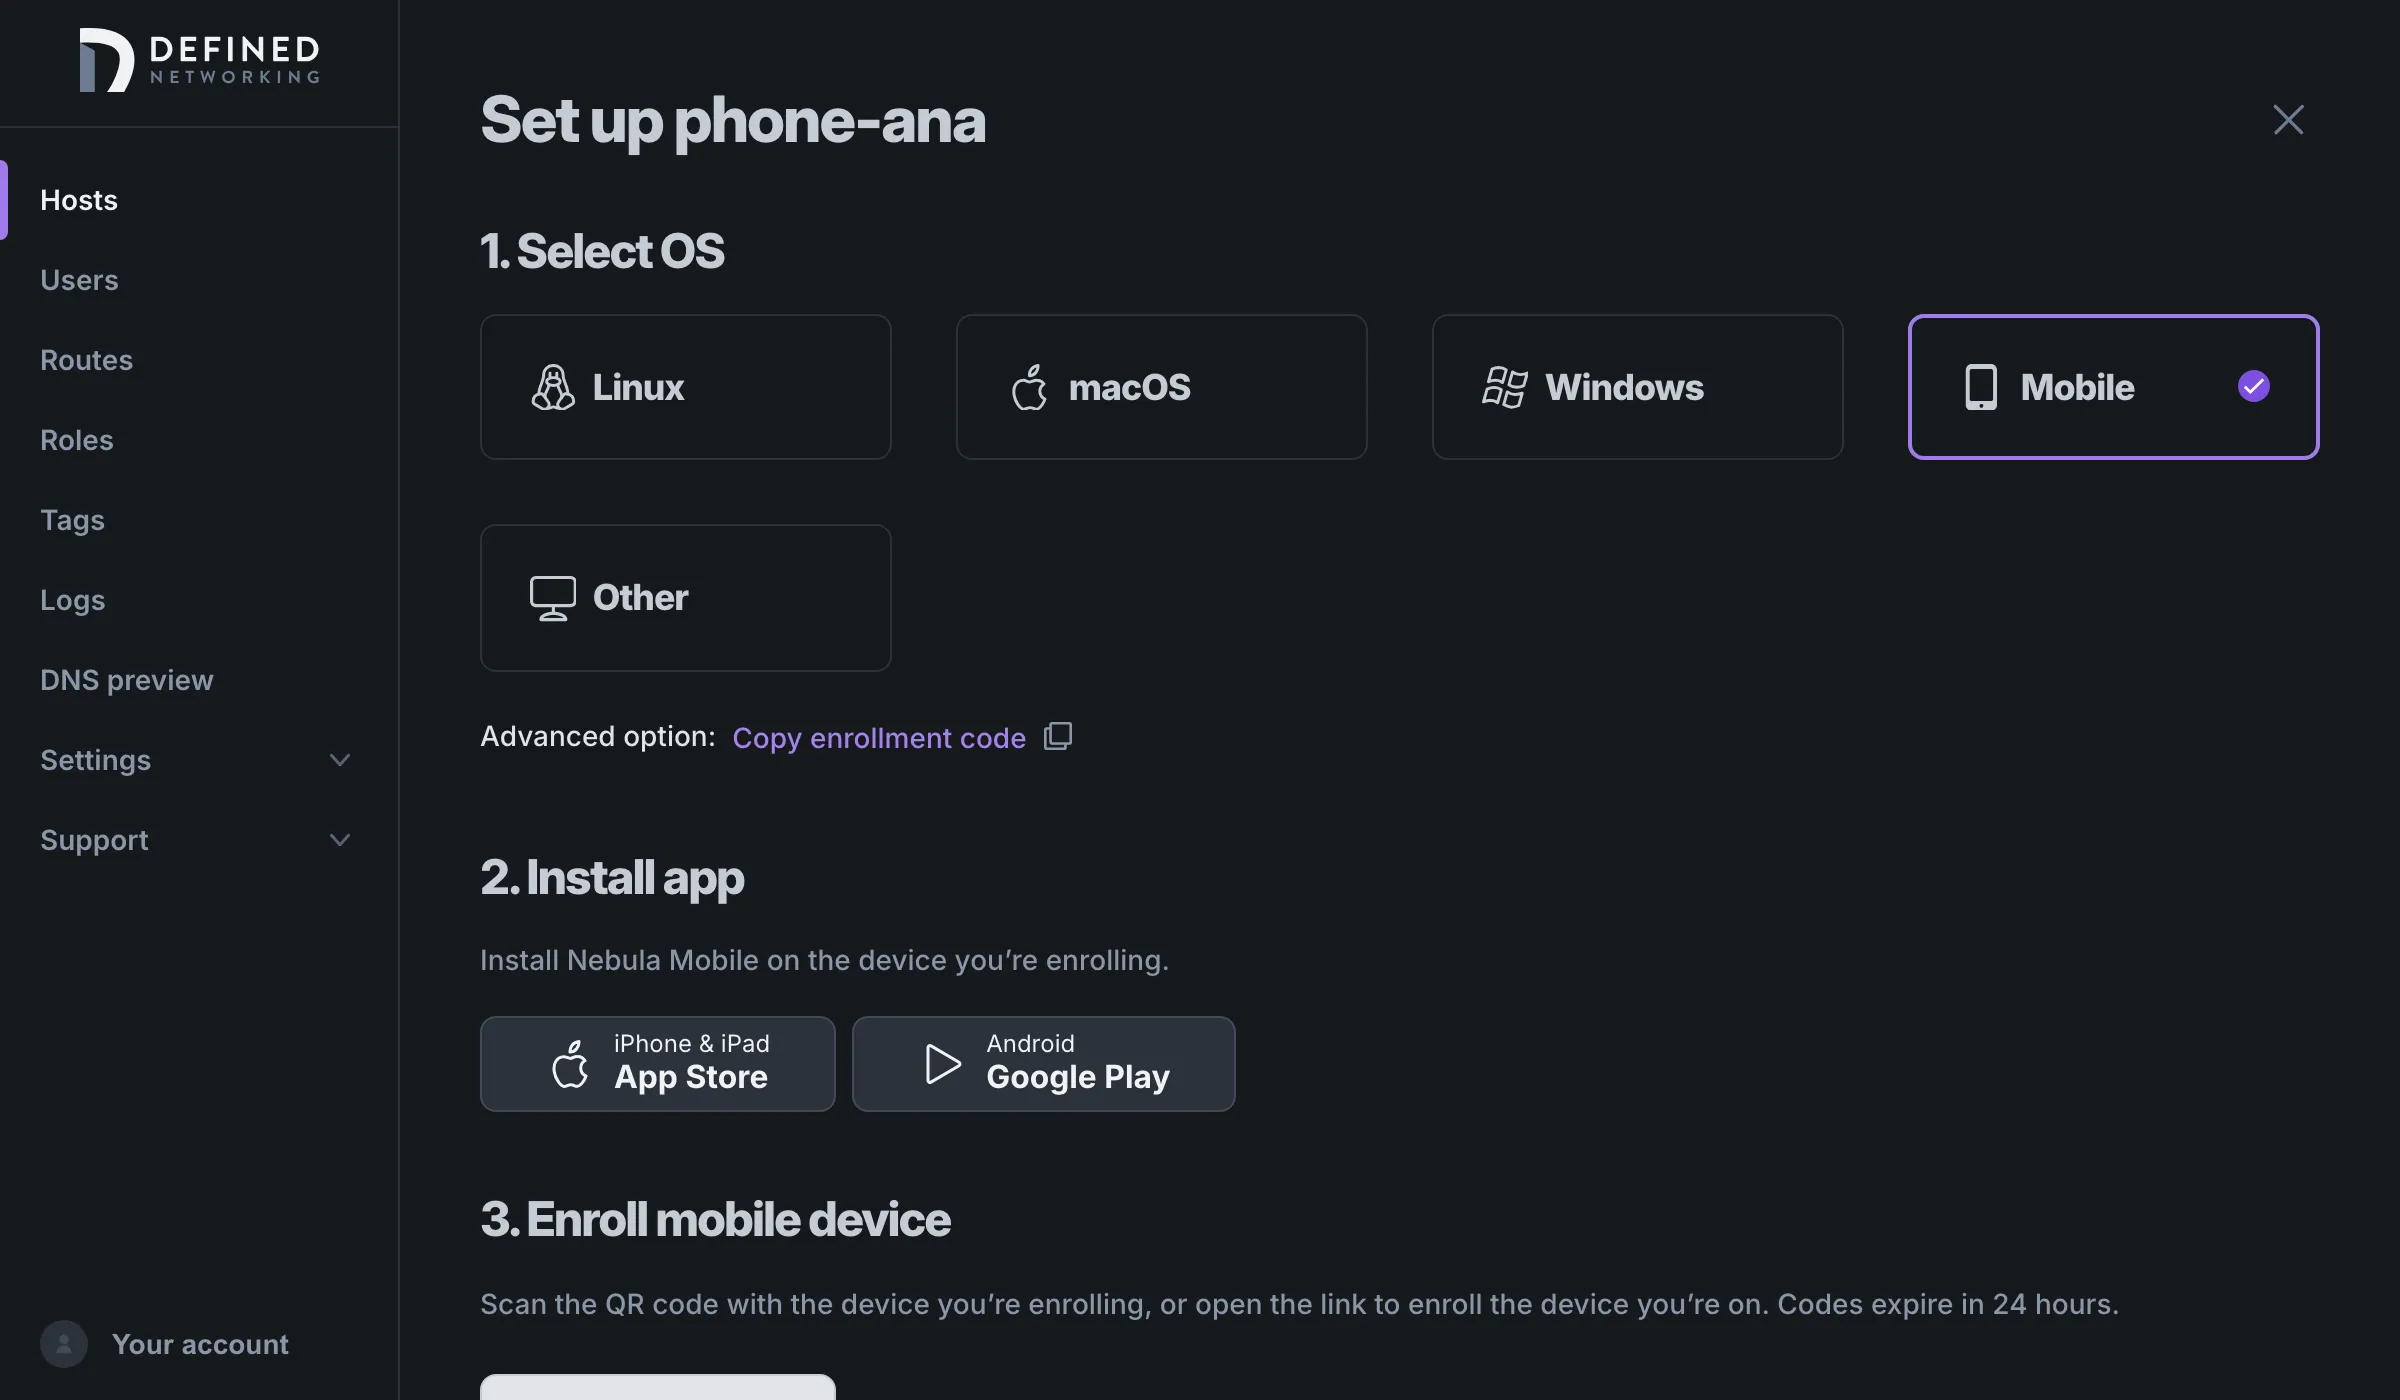
The screen then shows App Store and Google Play buttons under Install app and, under Enroll mobile device, a QR code and an enrollment link. The QR code encodes the same link.
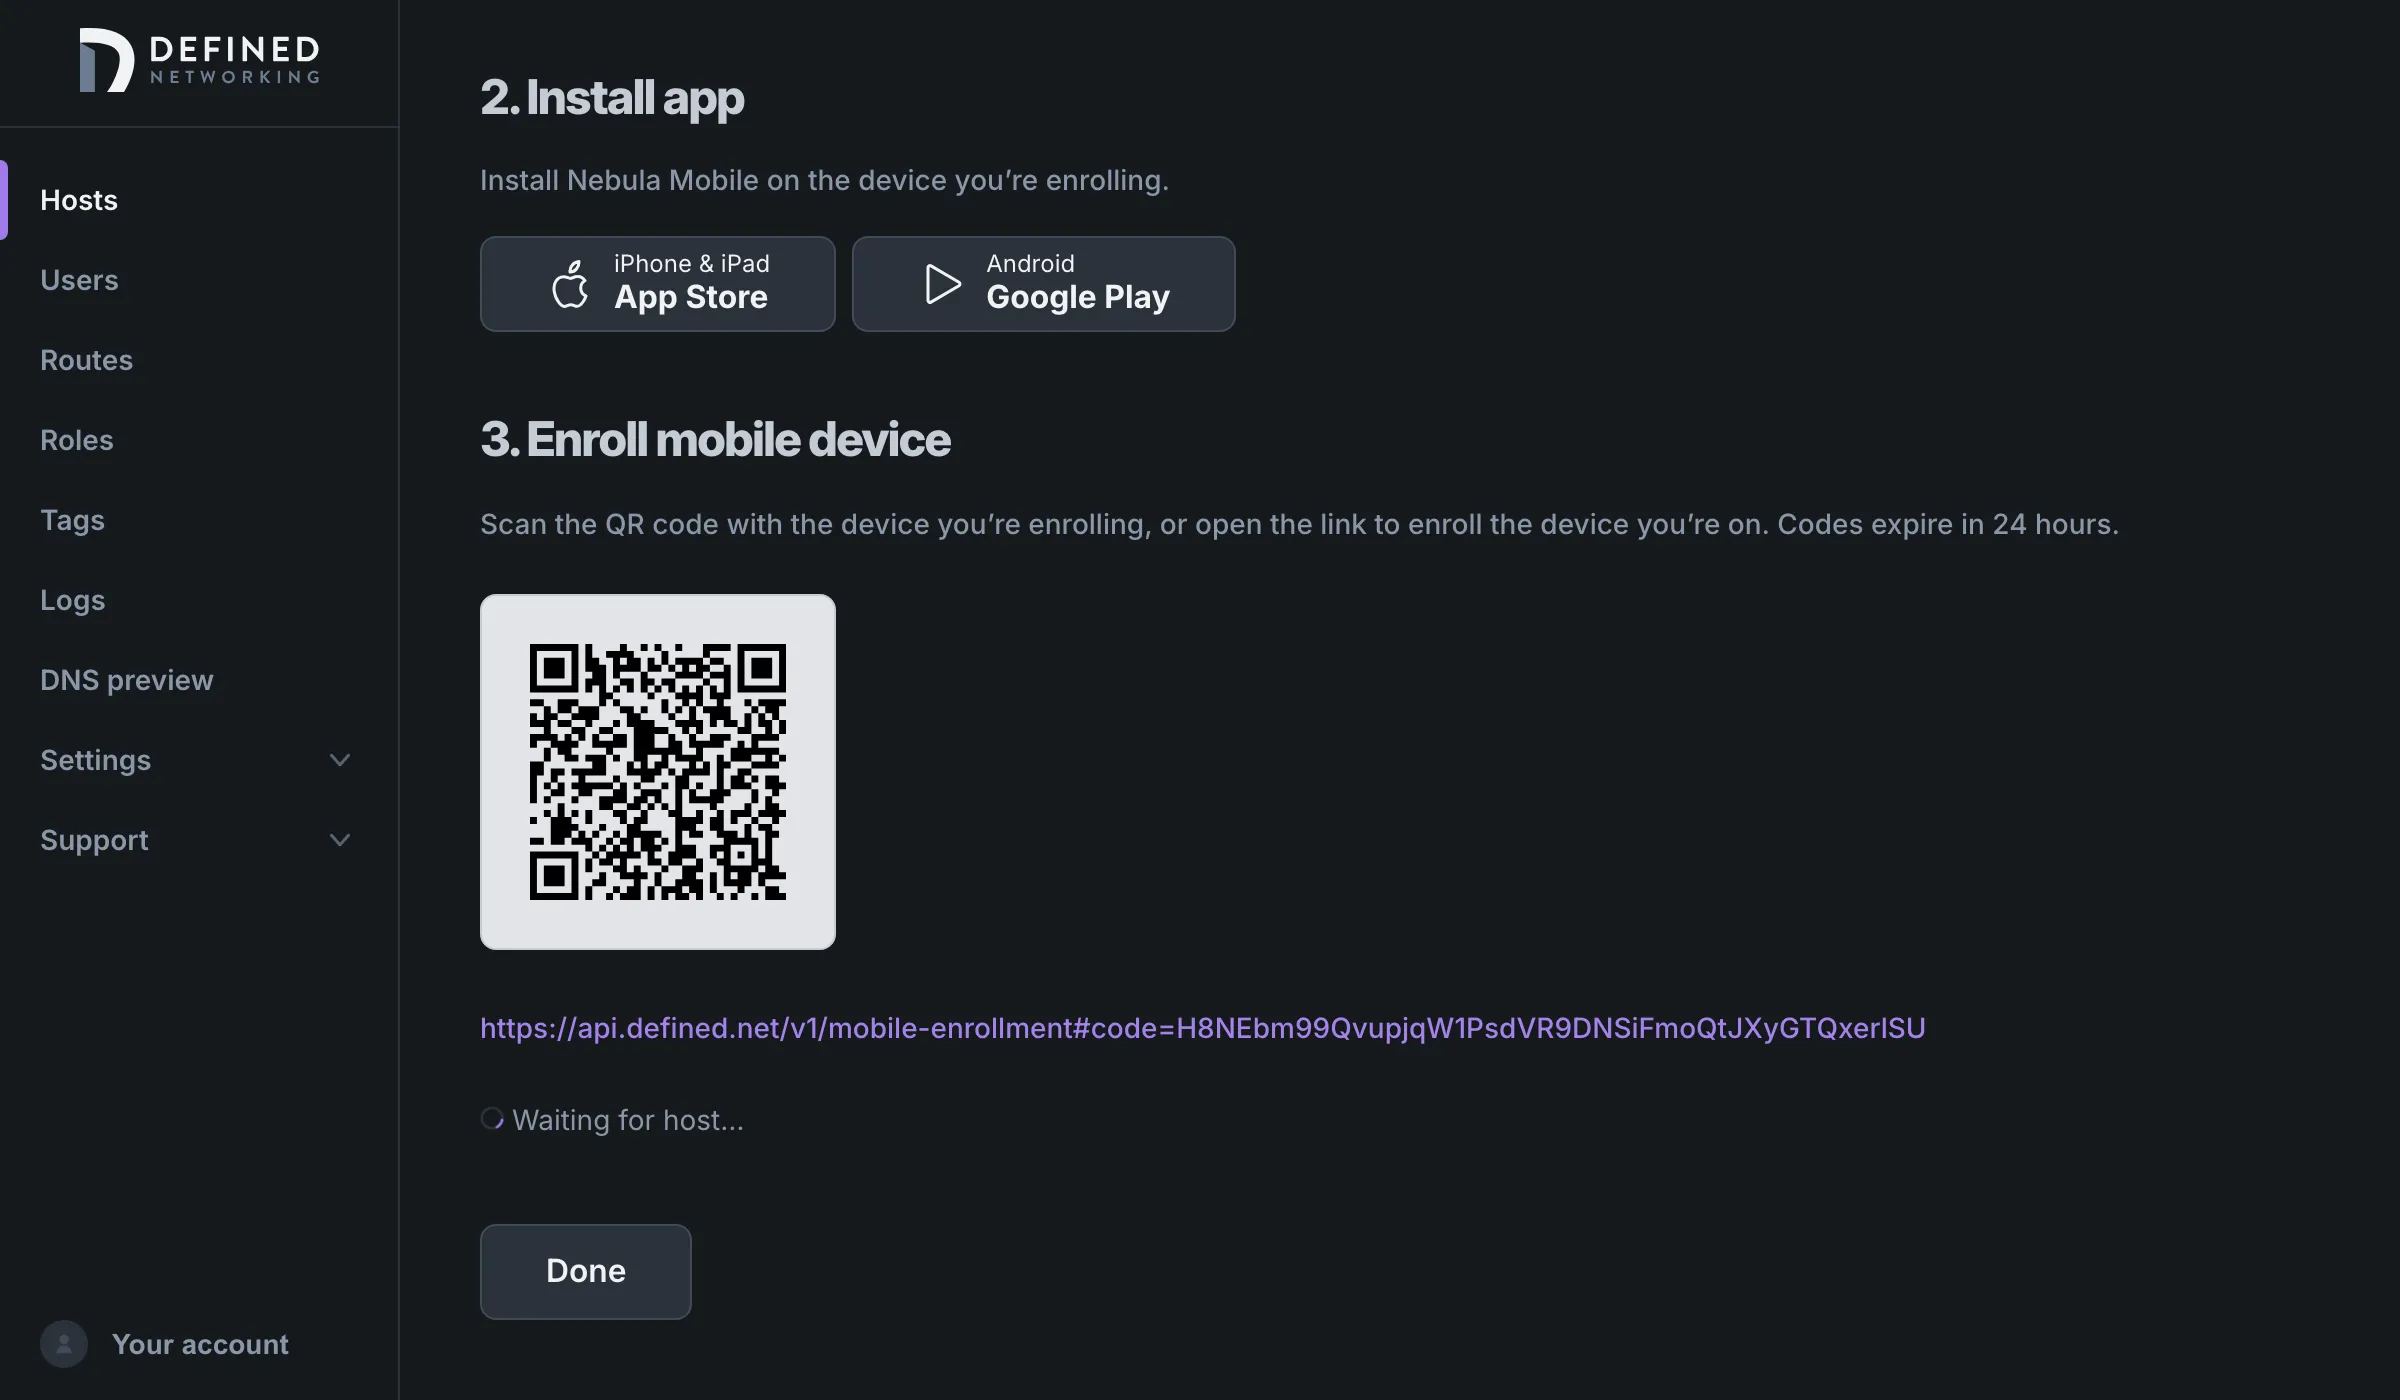
An enrollment code enrolls one device and expires, by default after 24 hours. If a code expires before it’s used, open the host in the admin panel and re-enroll it to get a new one.
To enroll many devices without creating a host for each, use a join key instead. The app accepts a join key’s token anywhere it accepts an enrollment code. Each device enrolled with a join key joins as a new host named after the key with a random suffix, like my-key-p2rgenc2, rather than after the device.
Enroll the device
Section titled “Enroll the device”The quickest way to enroll is to scan the QR code from the setup screen with the device’s camera, or to open the enrollment link on the device. Either one opens Mobile Nebula on an Enroll with Managed Nebula screen, which contacts Defined Networking, downloads the host’s certificate and configuration, and reports that enrollment is complete. The network then appears on the app’s main screen as a site.
If the app isn’t installed yet, the link opens a page with the store links instead. Install the app, then open the link again.
You can also enter the code by hand, which is handy when the code was sent to you as text:
- Open Mobile Nebula and tap Add Site.
- Choose Enroll with defined.net.
- Paste the enrollment code or the enrollment link into the Code or link field and tap Submit.
If the app reports that no valid enrollment code was found, the link or code was incomplete. If enrollment fails for another reason, the code has most likely expired or already been used: re-enroll the host in the admin panel and try again with the new code.
Connect
Section titled “Connect”Tap the switch next to the site on the main screen, or open the site’s details and turn it on there. The first time, the operating system asks for permission to add a VPN configuration, which is how Mobile Nebula sends the device’s overlay traffic through Nebula. Only traffic for your overlay network and any routes goes through the tunnel. Everything else, including DNS, uses the device’s normal connection.
Phones and tablets allow only one VPN to be active at a time. Connecting a Nebula site disconnects any other VPN app, and any other Nebula site.
Once connected, the host shows as online on the Hosts page with its platform listed as mobile and its operating system as iOS or Android. The site’s detail screen in the app lists its active and pending tunnels to other hosts.
Stay connected with Always-on
Section titled “Stay connected with Always-on”By default the connection stays up until you turn it off or the operating system stops it. To keep the device on the network across reboots, sleep, and network changes, open the site’s details and turn on Always-on. On Android, also tap Verify system always-on is enabled, which opens the system’s VPN settings so you can confirm Mobile Nebula is set to always-on there too.
Phones on cellular networks
Section titled “Phones on cellular networks”Cellular carriers almost always put phones behind carrier-grade NAT, which blocks direct connections to hosts behind other NATs. When that happens the traffic goes through a relay instead. Your network’s lighthouses act as relays by default, so this works without any setup. See Using dedicated relays if you’d rather run your own.
Allow traffic to and from the device
Section titled “Allow traffic to and from the device”A new role only allows other hosts to ping the device. The device’s firewall rules come from its role and tags in the admin panel, not from settings in the app, so edit the role to let other hosts reach the device, or edit the roles of the hosts the device needs to reach. See Creating firewalls using roles and tags.
Join more than one network
Section titled “Join more than one network”A device can be enrolled in several Managed Nebula networks. Create a host for it in each network and enroll each one as above. Every enrollment adds its own site to the app. Only one site can be connected at a time, so switch between them from the main screen.
Remove a device
Section titled “Remove a device”To take a device off the network, delete or block its host in the admin panel, which cuts it off from every other host. To clean up the device itself, open the site’s details in the app and tap Delete. Deleting the site from the app alone doesn’t remove the host from your network.
Troubleshooting
Section titled “Troubleshooting”Each site keeps its own logs in the app. Open the site’s details and tap Logs to read or share them, as described in Viewing DNClient logs. The logs are cleared each time the site starts, so reproduce the problem before sharing them.
If an enrollment error includes details, the app shows them alongside a link to support@defined.net. Include the error text when you write in.